
Overview
A New Episode must be created for every video or audio uploaded and published to Jetstream Studio. You will need to create a Brand before you can begin to upload Episodes. Creating Seasons is recommended if you will upload a large amount of media. If you haven’t already done so, review the Initial Setup instructions first. (See the Initial Setup link at the bottom of the page for how to create a Brand.)
How to
Add a New Episode
- Log in to Jetstream Studio, https://app.jetstream.studio/. See the Initial Setup link below for further instructions if needed.
- From inside your Brand, click the blue link add New Episode. If you have added a Season, you can choose the add New Episode link across from a Season you have created or choose the link across from the No season option. (You may need to expand the Season or No season option to see the link to add a New Episode.) Seasons can be added later as needed and episodes can be moved.
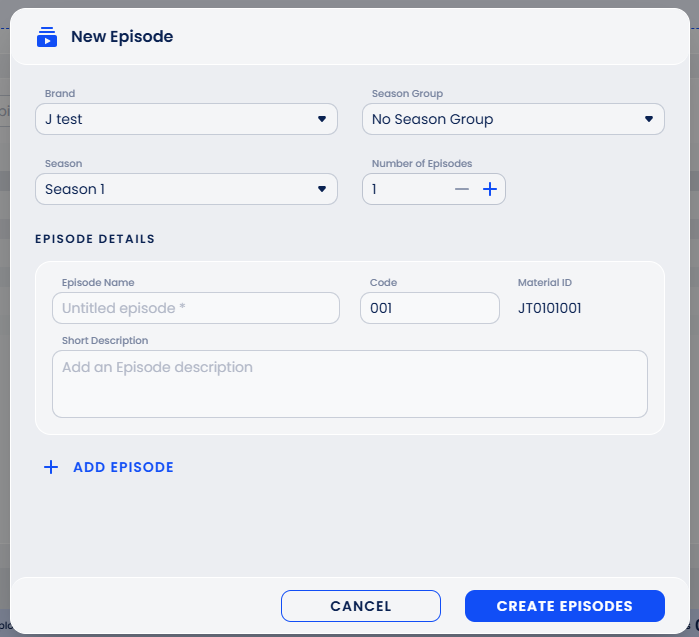
- Fill in the fields in the modal box. First, you will only create the Episode Name. You can add as many Episodes as you want by clicking on the + Add Episode link. When done, click the blue button Create Episodes.
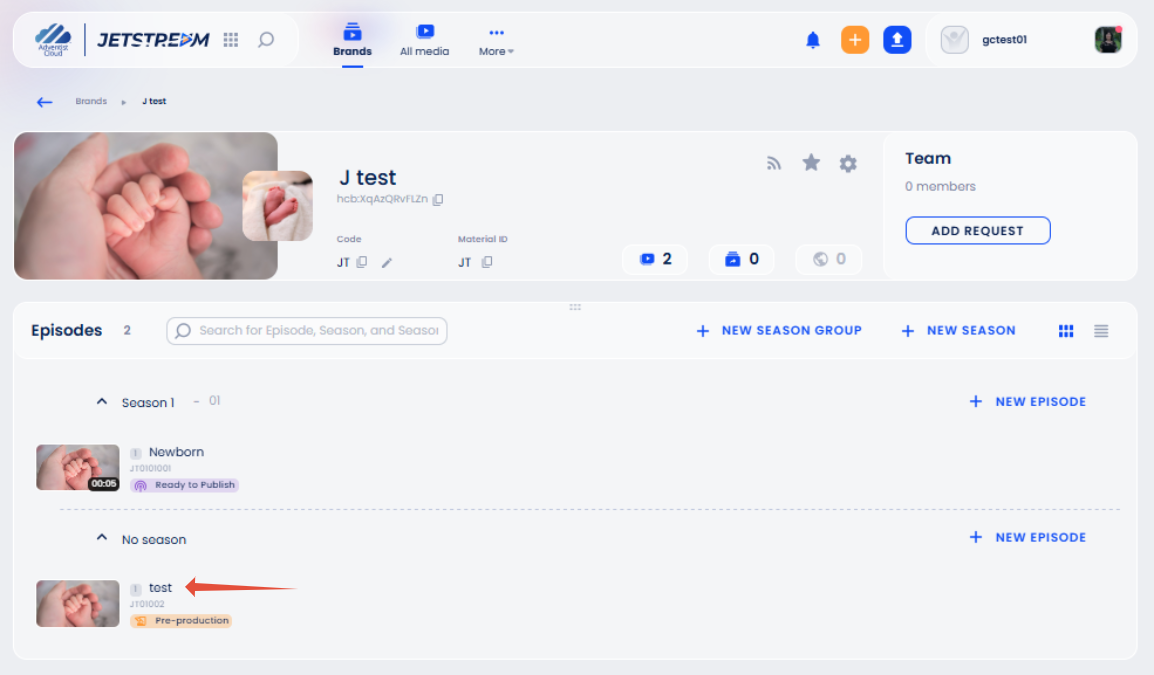
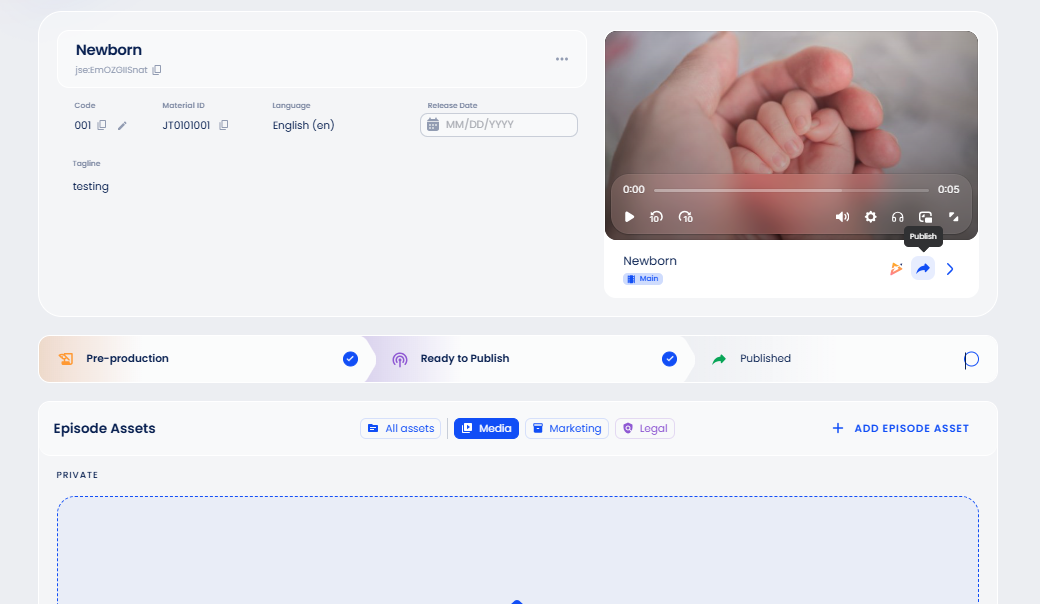
- Click on the title of the Episode you created. This will open the Episode page.
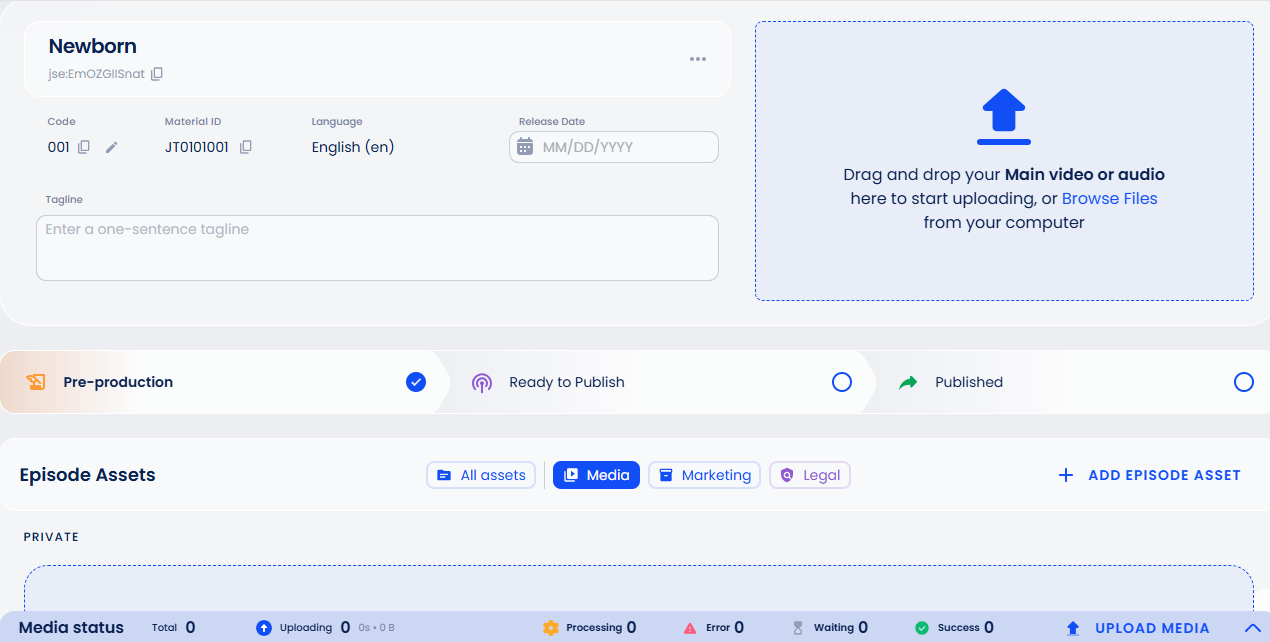
- Title: The Episode title can be edited. It can be up to 70 characters. If you click the 3 dots to the right of the title field, you can click on the link to Move the episode or Remove Episode.
- Main video or audio: On the right side, click the large blue up arrow to add your video or audio. It will say: Processing until it is finished. Note: A video needs to have an audio track even if there is no sound.
- Tagline: You can enter up to 120 characters.
- Episodes Assets: This provides storage for optional additional files.
- Episode Metadata
- Short Description: You can enter up to 800 characters.
- Long Description: You can enter up to 2400 characters.
- Tags: You can add tags.
- Hosts: You can add a host.
- Guests: You can add a guest.
- Change log: See the changes made to your Episode at the bottom right.
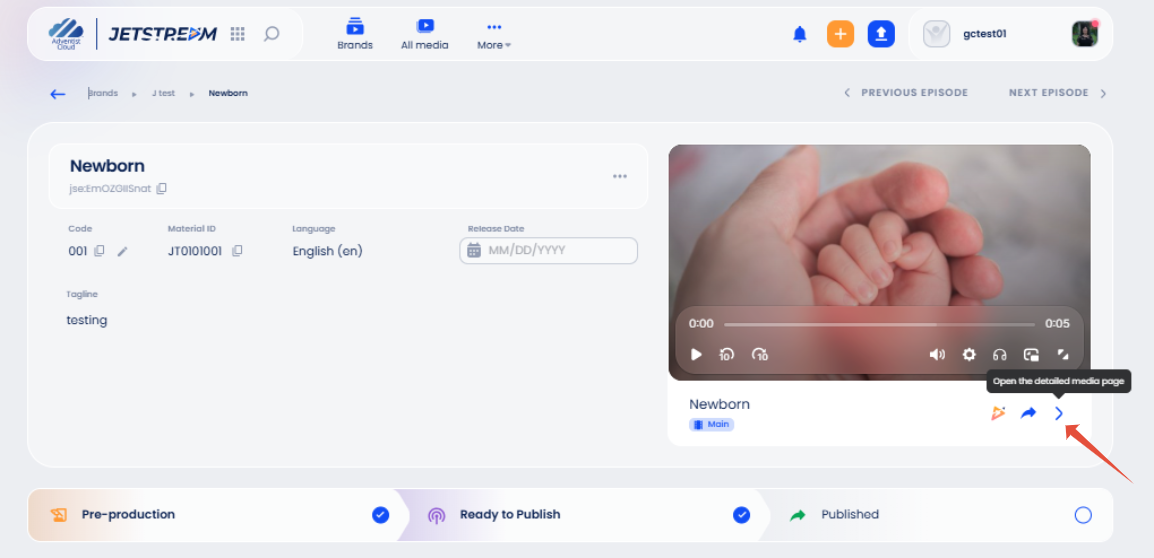
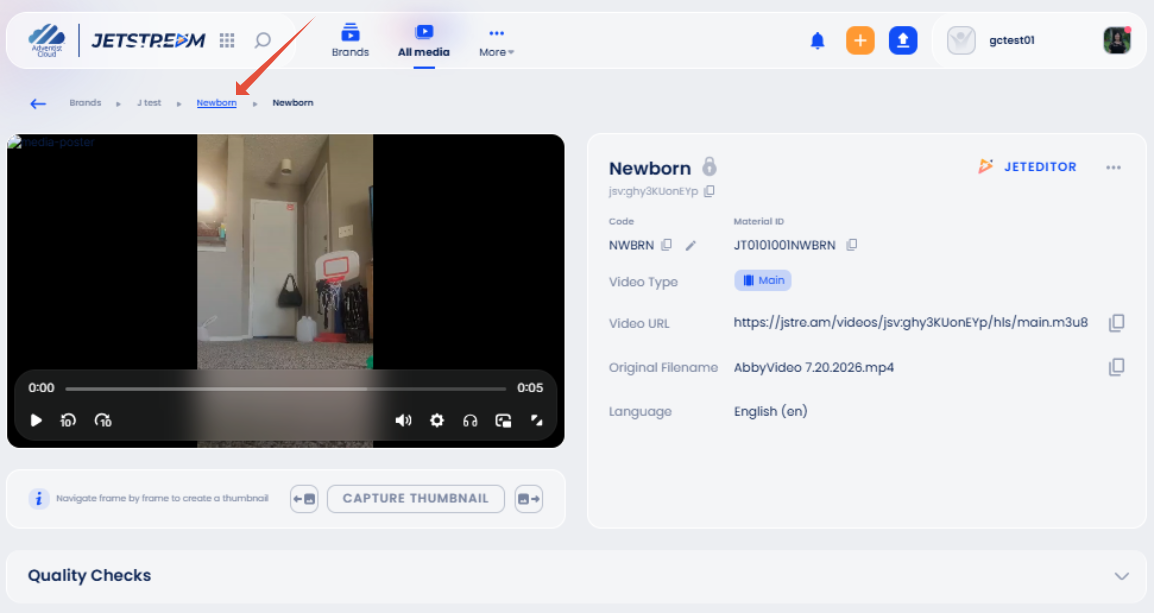
- Detailed media page: Scroll back up to the main video or audio on the upper right. Open the detailed media page by clicking the right-angle bracket to the right under the video or audio file (or the title under the file).
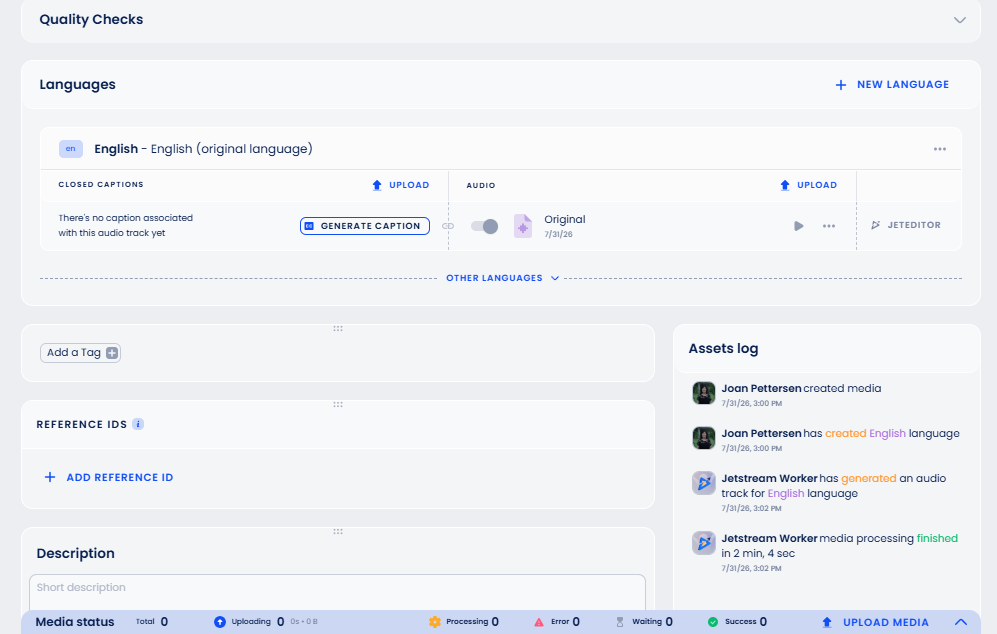
- Quality Checks: You can expand these to see the process your video or audio has gone through.
- Languages: See the Languages link at the bottom of this page for additional information.
- Tags: You can add a Tag.
- Reference IDs: You can add a Reference ID.
- Description: You can enter up to 1000 characters.
- Export media: You can Export media.
- Thumbnail: You can upload a thumbnail or use the Capture Thumbnail button. You can move frame by frame and select the thumbnail from the video itself. The poster image from the brand is used as the default thumbnail for the episodes unless you change it.
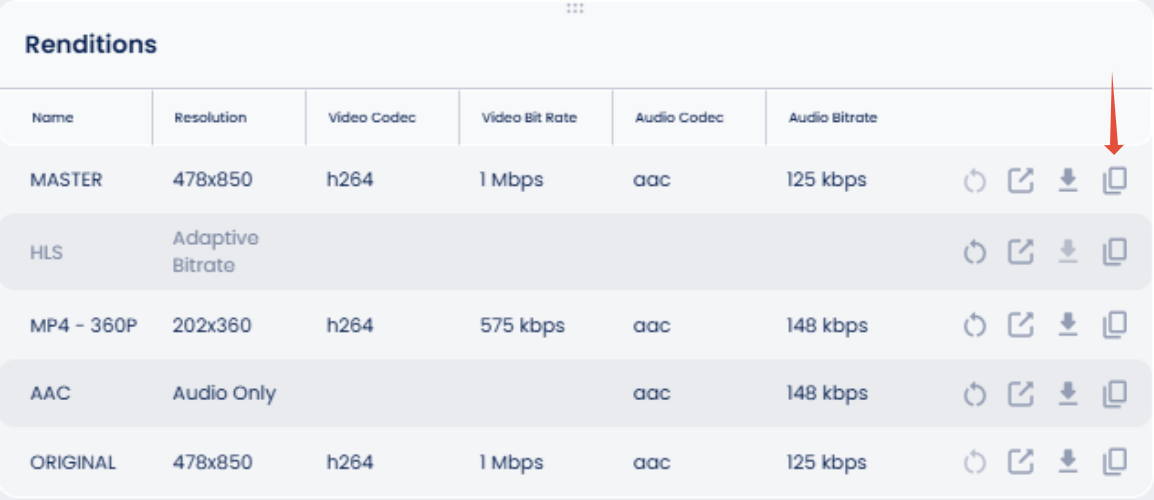
- Renditions: You have the Master and the Original. The Original that was uploaded could be an MOV file, for example. The Master is in MP4 format. The quality is still the same. You can download other versions by pressing the Copy icon on the far right across from the rendition Name and paste the link into the browser. You can also download the Audio Only.
- Video Info: Expand for more information about the original file.
- Audio Info: Expand for more information.
- Publish: You can publish to YouTube, to Facebook, to Web Engine, or use the Embed Code option.
- Media Views: There is also a link for More Analytics.
- Markers: You can add markers.
- Storage location info: This may appear if applicable.
- Migration History: This may appear if applicable.
- If you want to add captions and/or translations to the Jetstream product you created, see the link below: Using Languages.
- Next, you can use the instructions for How to publish a Video or Audio created in Jetstream. See the link below.
Additional information
- Initial Setup of Jetstream Studio
- Using Languages in Jetstream Studio
- How to publish a video or audio created in Jetstream